How to Cancel Subscription on iPhone in a Few Seconds
Would you like to Cancel Subscription on iPhone because you don’t really need it or for other reasons? Whatever the reason, this guide helps you to cancel your subscription you no longer want through iPhone in just a few seconds.
How to Cancel Subscription on iPhone?
Here is a step-by-step guide on cancelling subscriptions on an iPhone or iPad.
Step 1: Locating the Settings App
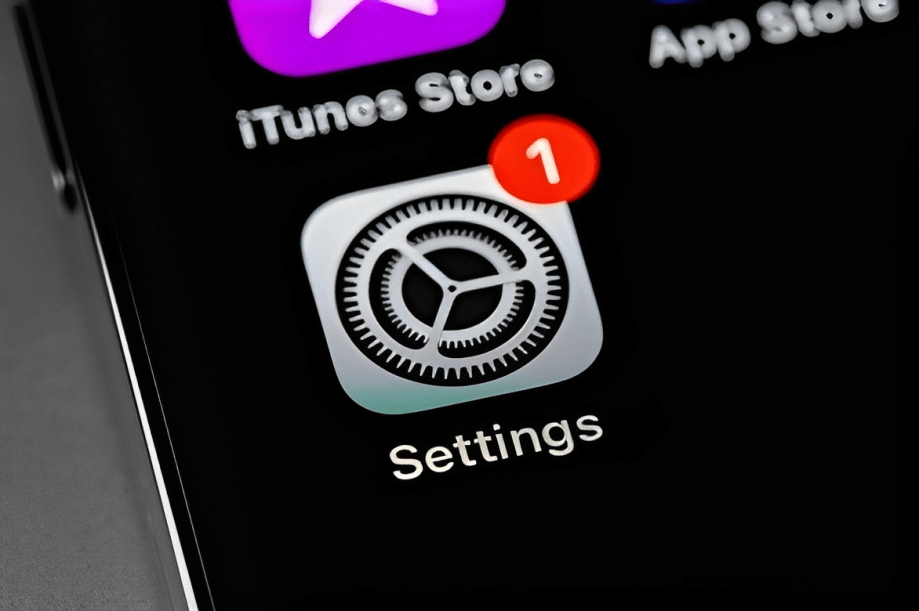
The first step in cancelling a subscription is to open the Settings application on your iPhone or iPad. The Settings app is easily recognizable by its grey icon displaying a gear symbol. You can find it on your home screen. Tap the Settings icon to launch the app.
Step 2: Accessing Your Account Profile
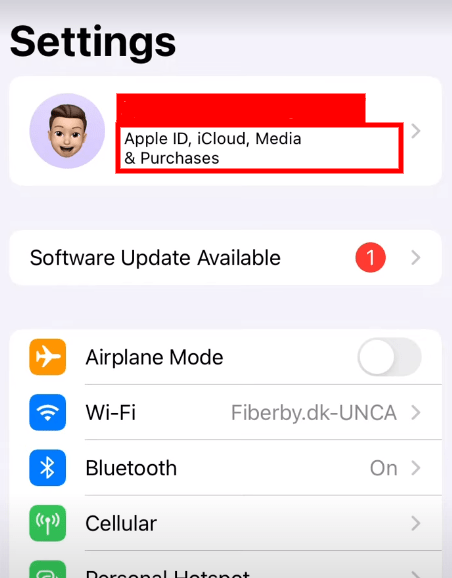
Once the Settings menu appears, scroll down and tap on your name at the top of the screen. This will open your Apple ID account profile where your subscriptions can be accessed.
Step 3: Viewing Active Subscriptions
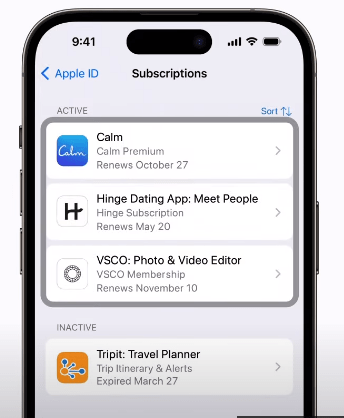
In your account profile, select the “Subscriptions” option. This will display a list of all your active app, service, and website subscriptions. Review the list to identify the subscription you wish to cancel.
Step 4: Select the Subscription
Tap on the specific subscription you want to cancel from the list. This will bring up detailed information and settings for that particular subscription.
Step 5: Cancel the Subscription
Look for and tap the “Cancel Subscription” button. This is usually located near the bottom of the subscription details screen. Tap “Confirm” on the pop-up to fully cancel the subscription. The status should now show as “Canceled.”
Soruce: https://support.apple.com/en-us/HT202039
Request Refunds for Apple Purchases
Some Apple purchases may be refunded. Use any web browser to request a refund. Learn below to request refund on Apple purchases.
- Sign in to reportaproblem.apple.com to request a refund.
- Choose the purchase you want to be refunded and the reason.
- Allow 24-48 hours for refund approval.
- Check your email for receipts if the purchase is not visible.
- Use the Apple ID that made the purchase to request the refund.
- Refund eligibility varies. See Apple Terms and Conditions.
- Contact Apple Support if you can’t request the refund online.
Video Guide
Alternative Options
If there is no “Cancel Subscription” button, the subscription may have already ended or been cancelled previously. You will see “Expired” or “Canceled” in red text. If you still see an active renewal date, the subscription cannot be cancelled online and you will need to contact the provider directly.
Confirming Cancellation
Once cancelled, the subscription will remain in your Settings list marked “Canceled.” This confirms it is completely ended and no further charges will occur. The subscription eventually disappears from the list entirely.
Following these straightforward steps allows you to easily cancel unnecessary subscriptions directly on your iPhone or iPad through the Settings menu. Let me know if you need any clarification on the process!
Wrap Up
To cancel subscriptions on your iPhone or iPad, go to the Settings app and tap your name at the top. This will show your Apple ID and account settings. Tap on Subscriptions to see your active list. Select the subscription you want to cancel. Tap on Cancel Subscription and confirm to completely end that subscription. The status will change to Canceled in your Settings. This stops future charges from occurring. The process is quick and easy directly on your iOS device.

